There’s no better dessert than a homemade honey cake recipe. Thin honey cake layers with layered homemade sour cream frosting. The layers soak up the frosting, making for a delicious and moist cake.
We love cakes that are made in thin layers. Whether a chocolate spartak cake or our dulce de leche napoleon cake, you will surely have an impressive dessert.

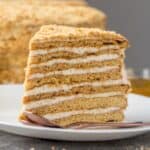
This honey cake, also known as Russian medovik, is a delicious, honey-infused cake. Individual layers are baked to a crisp finish. A soft sour cream frosting adds the perfect tartness to the sweet layers. When assembling, the layers soften and absorb the cream, resulting in a creamy, rich cake.
Why You’ll Love This Cake Recipe
- Make ahead. This is the perfect cake to make in advance. The cake only tastes better after sitting overnight.
- Delicious. This cake has the best flavor and is loved by all.
- Easy. Honey cake is the perfect introductory cake recipe; though time-consuming, the cake is not hard to make.

Ingredients for Honey Cake
- All-purpose flour – measured and sifted.
- White sugar – sweetens the cake.
- Butter – unsalted and cubed up at room temperature.
- Eggs – whisked.
- Honey – raw honey
- Heavy whipping cream – cold to help maintain texture.
- Cream cheese – softened to room temperature.
- Sour cream – at room temperature.
- Powdered sugar – thickens the frosting.
See the recipe card below for a complete list of ingredients and quantities.
How to Make Honey Cake
This step-by-step recipe makes this complex cake approachable:

1 – Sift flour and baking powder in a large mixing bowl and set aside.
Place a glass bowl over the top of a boiling pot. Add sugar, butter, honey, and baking soda to the bowl. Steam over until the sugar dissolves, and stir the mixture occasionally.
Slowly pour in the whisked eggs, stirring constantly to incorporate. Remove from heat. Quickly whisk in dry ingredients and set aside to cool.

2 – Start by sprinkling the surface area with flour and divide the batter into 7 even pieces. Roll a piece into a circle that is 9” in diameter. Use a round dish to cut out an even circle. Keep the scraps.
Place the cake layer onto a baking sheet lined with parchment paper and bake in the oven for 6-7 minutes. Place each layer to cool on a wire rack. Repeat with each layer. Bake leftover scraps.

3 – In a large bowl, beat heavy cream until thick and whipped.
In a separate bowl, beat butter and cream cheese. Add in sour cream, vanilla, and powdered sugar.
Fold to combine. Fold in the heavy cream.

4 – Add cream to a platter and first layer of cake. Add cream between each layer then cover top and sides of cake with cream.
Wrap the cake tightly in plastic wrap, refrigerate the cake overnight, serve, and enjoy.
Expert Tips for the Best Honey Cake
- Temperature matters: It’s important to make sure the butter, cream cheese, and sour cream are all at room temperature.
- Keep your surface floured when rolling out the dough.
- Use a generous amount of cream between the layers. The cake layers will absorb the extra cream.
- Allow the cake to come to room temperature after refrigeration before serving.

Recipe FAQs
If you don’t have enough scraps, use one of the layers for scraps. Use the most imperfect layer.
This cake tastes best when refrigerated overnight so that the layers of cake soften.
Sour cream adds acidity to the cream that balances the sweet honey cake layers.
Store
- Storage. The cake is best stored refrigerated. Cover tightly with wrap and store for up to 5 days.
- Freeze. Cake can be frozen and kept in the freezer for up to a month. Thaw: Place the cake in the fridge overnight before serving.
More Desserts
If you enjoyed this honey cake recipe, be sure to try our other popular dessert recipes, here are some of our favorites:
If you tried this honey cake recipe or any other recipe on my website, please leave a star rating and let me know how it went in the comments below – we appreciate it!
Russian Honey Cake Recipe
Ingredients
cake layers-
- 1/3 cup granulated sugar
- 3 Tbsp unsalted butter room temp & cubed
- 3 large eggs whisked
- 1/2 cup raw honey
- 1 tsp baking soda
- 1 ½ tsp baking powder
- 3 cups all-purposeflour measured then sifted
cream-
- 2 ½ cups sour cream
- 4 Tbsp unsalted butter room temp
- 12 oz cream cheese room temp
- 1 tsp vanilla extract
- 1 3/4 cup powdered sugar
- 1/2 cup heavy whipping cream
Instructions
cake layers –
- In a bowl, sift together flour, baking powder and set aside.
- Bring a pot of water to a boil and place a glass bowl over it. In the glass bowl whisk sugar, butter, honey, and baking soda. Steam over medium-high heat until the sugar dissolves, stirring occasionally.
- Add in the whisked eggs slowly, while whisking until well incorporated. Remove the bowl from the heat.
- Stir in the dry ingredients and set aside to cool. Once cooled, dust your surface area with flour and divide the batter into 6 pieces.
- Preheat the oven to 375°F. Take a section of dough and sprinkle with flour. Roll the dough out to a 9-inch diameter. Use a 9” round pan to measure out a circle and cut it out. Save the scraps.
- Place the cake layer on a baking sheet and bake for 6-7 minutes. Repeat with the rest of the layers, then bake the leftover scraps.
frosting –
- In a large bowl, beat heavy cream until thick and whipped.
- In a separate bowl, beat butter, and cream cheese. Slowly beat in the sour cream, vanilla, and powdered sugar.
- Fold the heavy whipping cream into the sour cream mixture.
assemble the cake –
- To a cake platter, add the cream mixture, and then add a cake layer.
- Add a generous amount of cream to the cake layer and top with another cake layer. Repeat with the remaining cake layers.
- Use the remaining cream to coat the top and sides of the cake. Crush the scraps by hand or using a blender. Use the scarp crumbs to cover the sides and the top of the cake.
- Refrigerate the cake overnight before serving.
Notes
- Temperature matters: It’s important to make sure the butter, cream cheese, and sour cream are all at room temperature.
- Keep your surface floured when rolling out the dough.
- Use a generous amount of cream between the layers. The cake layers will absorb the extra cream.
- Allow the cake to come to room temperature after refrigeration before serving.