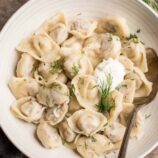
This dumplings pelmeni recipe is the only traditional pelmeni recipe you’ll need! A classic dough filled with a tender meat filling, shaped and boiled to perfection. These pelmeni are easy to make, whether you choose to do them by hand or with a mold. We have all the tips you’ll need for the easiest process.

Pelmeni – The Most Freezer-Friendly Recipe
Meat pelmeni are the perfect meal to freeze and have on hand for a quick dinner when busy. I almost want to say that they are even better when frozen (I know, a crazy statement!). Something about the convenience of just tossing them into a boiling pot of water and having a hearty dinner ready in less than 5 minutes. It simply doesn’t get better than that!
Before You Start
Here are some things you’ll need before you get started:
- Have the right ingredients: Pelmeni are made with simple ingredients, resulting in a delicious meal. Chances are, you already have all of the ingredients!
- Do you have the right tools? We use a kitchen aid to mix the dough, but you can always knead by hand. You can also use a pelmeni mold to make the process even easier! We cover both the mold method and the handmade approach.
- Get settled in. Making pelmeni can be a labor of love, especially when done by hand. However, I find it to be incredibly therapeutic! Double the recipe for the freezer, turn on some music, and enjoy the process!
Have You Tried These Before?
Have you ever tried uzbek manti? They are a uzbek classic that reminisces about pelmeni but with a twist. Each dumpling is loaded with meat and potatoes, then steamed to perfection. These are a cross between pelmeni and pierogies!

Pelmeni vs Pierogi
Pelmeni and pierogi are often confused with each other, and although they use the same dough, they are pretty different. Our classic pierogi recipe features a soft dumpling filled with mashed potatoes, while pelmeni are typically filled with meat. However, both are staples in Slavic cuisine.
What Kind of Meat Goes in Russian Pelmeni
Traditional pelmeni can be made with just about any ground meat or combination of meats. The most popular options would be ground pork, beef, lamb, turkey, or chicken. The most traditional version uses a blend of beef and pork. However, our family prefers pork and chicken.
How to Make Pelmeni Dough From Scratch
- Add the dough hook to your KitchenAid stand mixer, and add milk, salt, egg, and water: mix.
- With the KitchenAid running, slowly add the flour, one cup at a time. Be sure to add at the slowest speed so the flour doesn’t splash everywhere.
- Once the flour is fully incorporated, knead the dough until it is smooth and no longer sticks to your fingers.
- Cover the dough with a paper towel and rest for 15-30 minutes. Resting the dough is vital.

Pelmeni Dough Troubleshooting
Sticky dough? If your dough feels too sticky, you may be tempted to add more flour. I recommend kneading the dough first with your hands or using a mixer for 5-10 minutes. If it is still too sticky, add 1-4 tablespoons, as needed.
Dry dough? If your dough is too dry, it could be a result of improper measurements. However, all is not lost! Start by adding 2 Tbsp of water and mix. If your dough is still dry, add another tablespoon of water. Be careful not to add too much water.
Dough isn’t stretchy. If you’re rolling out your dough or shaping the pelmeni, and the dough is ripping and not stretching, the solution is simple: cover the dough with a towel and allow it to rest for 30 minutes. This lets the gluten relax, making it more pliable.
You can even make these with a premade dough to make the process even easier! Check out our easy pork dumplings for the best shortcut recipe.
Valentina’s Pro Tips for Pelmeni Dumplings
- Allow the dough to rest! Once the dough is kneaded, you want to cover it and give it some time to rest. The dough will become pliable and elastic and so easy to work with.
- Keep the dough covered. As you work with a section of the dough, keep the remaining dough covered tightly to prevent it from drying out.
- Dust the mold with flour. If you don’t generously dust the dough with flour, it will stick to the dough. I list to use a sieve with the flour so it’s evenly distributed.
- Grind meat yourself. Though you can purchase store-bought ground meat, we love to grind fresh meat using a kitchen-aid meat grinder attachment.
How to Make Pelmeni Meat Filling

- To a bowl, add ground meat, grated onions, garlic, salt, pepper, vinegar, water, and fresh dill.

2. Use your hands to mix it in until it is well incorporated.
Shaping Pelmeni with a Mold

- Roll out a layer of dough.

2. Place the dough over the mold gently.

3. Use a teaspoon to add a portion of meat to each dumpling.

4. Roll out another layer of dough and put it on top of the mold. Use a rolling pin until the edges seal, and pop the pelmeni out.
How to Shape Pelmeni by Hand

- Divide the dough into 3 balls. Roll each ball into a thin layer of dough.

2. Use a knife to divide the dough into small squares.

3. Add a teaspoon of dough into each square.

4. Take one dumpling at a time and hold it in your palm.

5. Fold the dough over and seal the edges.

6. Fold the corners into each other to create a round dumpling. Repeat with the remaining dumplings.
How to Boil Pelmeni
- Boil a pot of water with a teaspoon of salt and a bay leaf.
- Add the pelmeni into the pot. Once the pelmeni float to the top, cook for 2-3 minutes, or until they are cooked through.
- Remove from the pot with a slotted spoon and serve.
Serving Pelmeni
- Slavic classic: Toss the pelmeni with butter, sour cream, and fresh dill. This is the best and simplest combination.
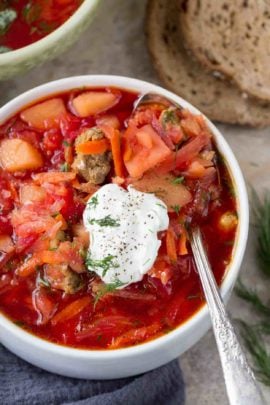
- Full course meal: Serve these pelmeni with a traditional beef and cabbage soup or a homemade baked plov for a tasty slavic combo!

How to Store Pelmeni (Freezer Tips)
- Storage. Keep leftover pelmeni in an airtight container in the fridge for up to 3 days.
- Freezing pelmeni. Pelmeni are among the most freezer-friendly dishes. When making a large batch, it’s so easy to toss some in the freezer and have it available for a quick and easy dinner. Here’s the best way to store them:
Arrange the uncooked pelmeni on a baking sheet lined with parchment paper. Add to the freezer and allow them to freeze completely before transferring them to a freezer-safe bag. This prevents them from sticking together. - Cooking from frozen: To cook pelmeni from frozen, simply add them to a pot of boiling water with a pinch of salt. Boil for 3-4 minutes or until the center is cooked through.
More Russian Recipes
If you enjoyed this pelmeni recipe, be sure to try our other traditional slavic recipes; here are some of our favorites:
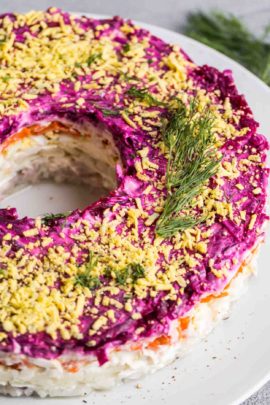
 Bread
Bread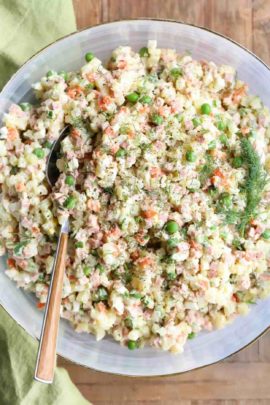 Salad
Salad Entree
 Entree


If you tried this pelmeni recipe or any other recipe on my website, please leave a star rating and let me know how it went in the comments below – we appreciate it!
Pelmeni Recipe (Meat Dumplings)
Ingredients
dough –
- 2/3 cup whole milk
- 1 tsp salt
- 1 large egg
- 3/4 cup water
- 4 1/4 cups all-purpose flour measured then sifted*
meat filling –
- 1 lb ground pork
- 1 lb ground chicken
- 1 medium onion grated in protruding holes
- 2 garlic cloves minced
- 2 tsp salt
- ¼ tsp ground black pepper
- 1 tsp vinegar
- 1 Tbsp water
- 3 Tbsp dill chopped
Instructions
- Make dough. Attach a dough hook to your KitchenAid. Add milk, salt, egg, and water to the bowl and mix.
- With the kitchen aid running, add the flour one cup at a time. Continue mixing until the flour is smooth and no longer sticks to your hands.
- Cover the dough and allow it to rest for 15-30 minutes before using it. (This helps relax the gluten so that it is easier to work with and is more stretchy.
- Prepare the meat filling. In a large bowl, combine all the ingredients for the meat filling.
- Cover and set aside until you’re ready to use it. (If prepping in advance, refrigerate before use.)
- Shaping with a mold. To shape with a mold, roll out enough dough to cover the mold.
- Use a teaspoon to fill each hole with meat.
- Roll out another layer of dough and cover the meat.
- Using a rolling pin, roll over the top of the mold until the edges protrude, and then gently push the pelmeni out. Repeat with the remaining dough and meat. Use the scraps of dough to make more pelmeni.
- Shaping by hand. Divide the dough into three balls. Roll each ball into a thin layer.
- Cut the dough into small squares.
- Fill each square with a teaspoon of meat and take one into your hand. Fold the dumpling over and press the edges together to seal them tightly. Repeat with the remaining dumplings.
- Cook pelmeni. Bring a large pot of water to a boil and season with salt.
- Cook for 2-3 minutes or until pelmeni float to the top.
- Serve the pelmeni as desired.
Notes
- Dough too sticky? If your dough is too sticky, try kneading it for 5-10 minutes before adding more flour. If the dough is still sticky after kneading, add a spoonful of flour at a time to prevent it from drying out.
- Dough too dry? If your dough is too dry, add ⅛ cup of water and mix. If it is still too dry, add another ⅛ cup of water. You don’t want to add too much water.
- Dough isn’t stretching? If you find the dough tearing when rolling out and shaping, simply cover the dough with a towel and rest for 30 minutes.
- How to serve pelmeni. Serve pelmeni with sour cream, butter, and fresh dill for the best flavor.
- Freeze pelmeni. Lay the pelmeni out on a baking sheet lined with parchment paper and freeze completely. Add to a freezer-safe bag and store for up to 3 months. Cook: Add the frozen pelmeni to a pot of boiling water and cook for 3-4 minutes, or until cooked through.
Nutrition
FAQ’s
This dough uses no yeast and does not require rising.
The easiest way to check is to take one out of the pot after 2-3 minutes and cut into it to see if it’s done. You can also use a meat thermometer to check the center and make sure it reaches 165°F.
Yes, you can absolutely mix the pelmeni dough by hand, and if you ask my Slavic mother, she’ll say you HAVE to.